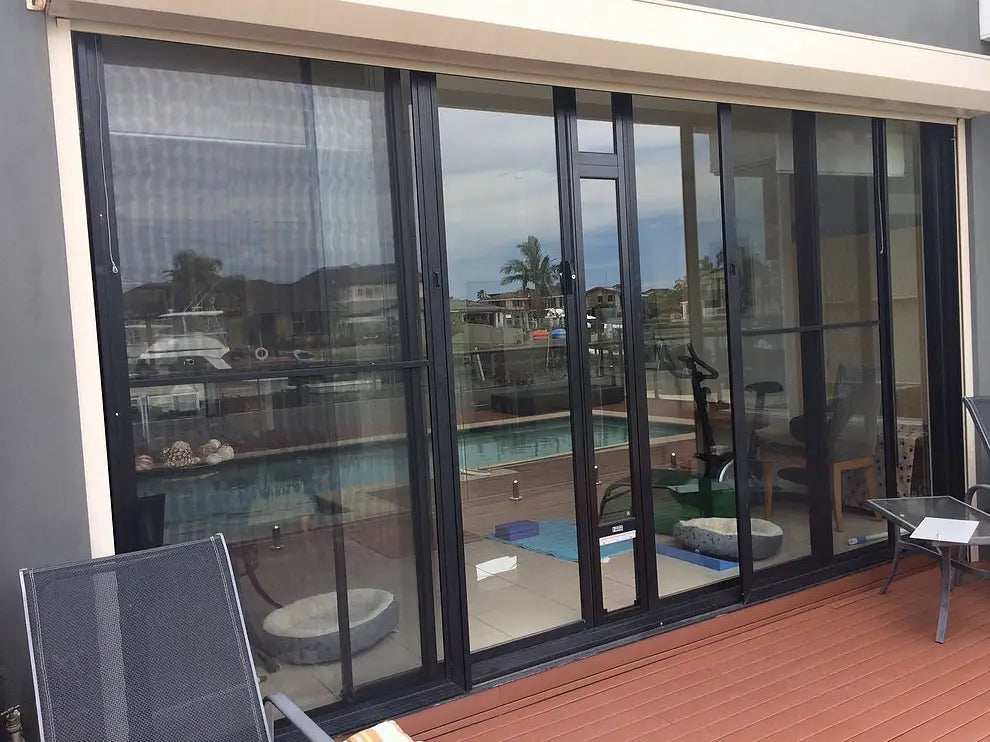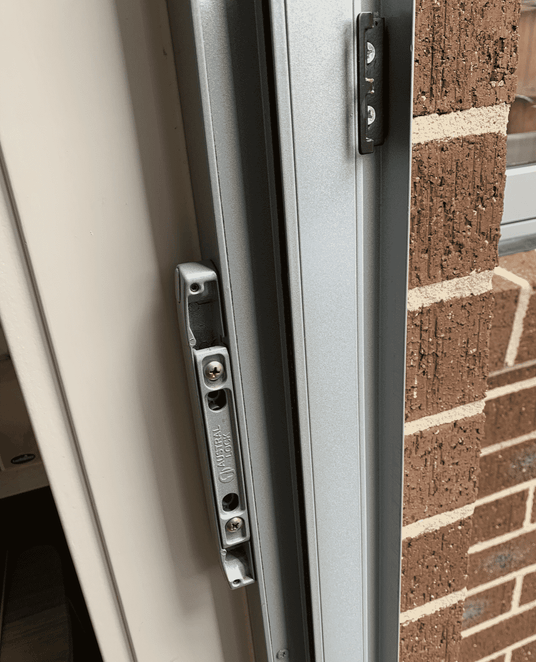
You will need
- Pet door insert, choose size and colour
- Locking bracket (comes FREE with pet door insert, Lock Glass sliding door only), OR
- Adaptor: close and lock both glass and fly screen door into adaptor
Once you relocate your female glass sliding door latch to either a locking bracket or an adaptor, you will need to secure pet door insert to your sliding door frame.
All you need to do is put 1 screw through your existing hole where female latch used to sit, to catch the pet door insert through the frame.
This way if anyone tries to push the pet door insert out, they cant and the pet door insert is secured to your sliding door frame.
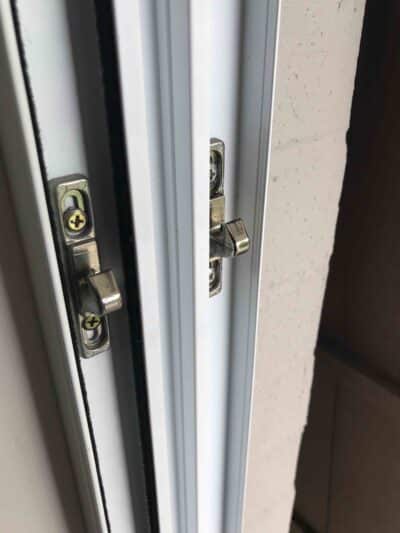
You will need
- Pet door insert, choose size and colour
- Adaptor: close and lock both glass and fly screen door into adaptor
- Plate to connect pet door insert to frame $5
Once you relocate your female glass sliding door latch (silver hook latch inside channel) to an adaptor, you will need to secure pet door insert to your sliding door frame.
You will need 1x PLATE to connect pet door to frame, and all you need to do is put 1 screw through the plate into existing hole inside channel where female latch used to sit,use pair of pliers and bend the plate and bring it forward to the vertical extrusion of the pet door insert and drill 2nd screw through the plate into the pet door insert frame.
Make sure that you DO NOT Drill too close to glass. Stay away 15mm from glass area.
This way if anyone tries to push the pet door insert out, they cant and the pet door insert is secured to your sliding door frame.
ADAPTOR will need to be cut and fitted into the track top and bottom. (Watch our adaptor installation video)
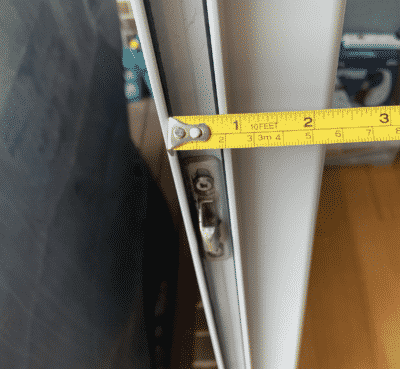
IMPORTANT TO CHECK – How wide is side channel?
- Please check how wide is your side channel (inside channel) where silver female latch is sitting in. If side (inside channel) is LESS than 20mm wide then this means it is too narrow for a pet door insert and installation will NOT work.
- If you have this type of door, the only way you can do installation is if you do a corner installation. Check if your doors are compatible for a corner installation, watch this video, click here
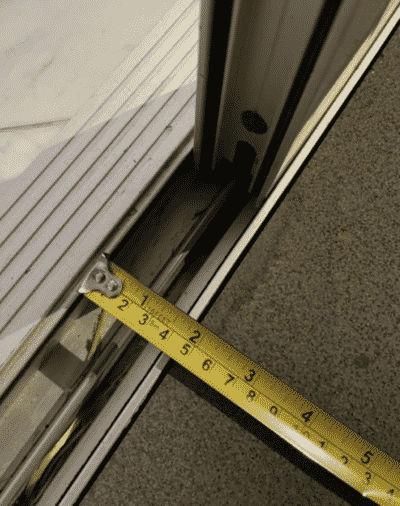
IMPORTANT TO CHECK – How wide is bottom channel?
- Please check how wide is your bottom glass sliding door channel (inside channel) . This is bottom track where pet door insert will sit into – like photo / left. If bottom (inside channel) is LESS than 26mm wide then this means you will need to purchase 2x Legs for the bottom of the pet door insert. Legs will accomodate channel width between 22mm-25mm.
- If you have Double Sliding doors, your bottom track must be minimum 26mm or more for the wheels to work. If your track is less than 26mm, then wheels will not work.
- Our Patio Link pet door insert is 26mm thick.
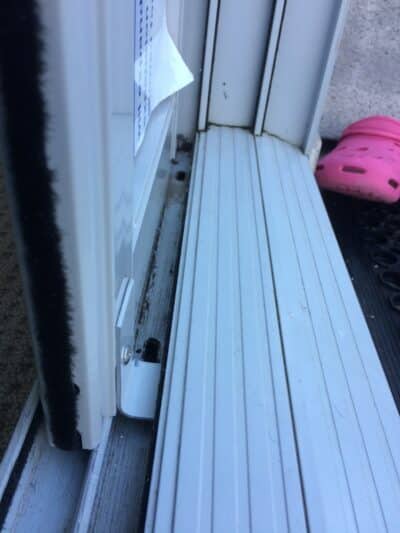
THICKER SLIDING DOOR CHANNEL
Glass sliding door channel where the pet door insert will sit into at the bottom is thicker (3.5-4cm) than a standard channel width (2.6cm-3.4cm) , so when you sit the pet door insert, you don’t sit it on the middle rail at the bottom.
You will need to bring the pet door forward in the track so you can align the locks easier to a locking bracket. With some doors, you might even need to use a clear plastic spacer to help align the locks together, (Clear Plastic Spacer strip comes free with every locking bracket).
Use Plate and bend it with pair of pliers to create an angle bracket at the bottom corner of the pet door insert. Do not drill into your glass sliding door. One screw goes through the plate into the pet door insert and other leg from Plate/Angle Bracket is extended to the end of the channel. This supports the pet door insert to stay firm in place and it doesnt go backwards and forwards.
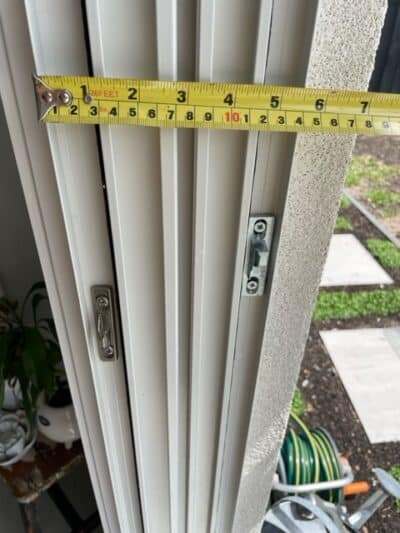
You will need:
- Pet door insert, choose size and colour
- close and lock both glass and fly screen door into adaptor
- L-Profile: extend adaptor
- Plate to connect pet door insert to frame $5
Once you relocate your female glass sliding door latch (silver hook latch inside channel) to an adaptor, you will need to secure pet door insert to your sliding door frame. You will need 1x PLATE to connect pet door to frame, and all you need to do is put 1 screw through the plate into existing hole inside channel where female latch used to sit,use pair of pliers and bend the plate and bring it forward to the vertical extrusion of the pet door insert and drill 2nd screw through the plate into the pet door insert frame. Make sure that you DO NOT Drill too close to glass. Stay away 15mm from glass area. This way if anyone tries to push the pet door insert out, they cant and the pet door insert is secured to your sliding door frame.
ADAPTOR will need to be cut and fitted into the track top and bottom. (Watch our adaptor installation video)
L PROFILE will need to be connected to the adaptor using Pop Rivet gun.
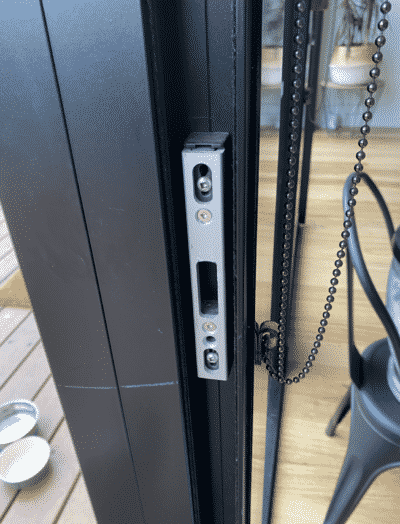
You will need:
- Pet door insert, choose size and colour
- Adaptor U Channel: close and lock glass sliding door into adaptor U channel Panel
- Plate to connect pet door insert to frame $5
Once you relocate your female glass sliding door latch (silver block latch inside channel) to an adaptor U Channel, you will need to secure pet door insert to your sliding door frame. You will need 1x PLATE to connect pet door to frame, and all you need to do is put 1 screw through the plate into existing hole inside channel where female latch used to sit,use pair of pliers and bend the plate and bring it forward to the vertical extrusion of the pet door insert and drill 2nd screw through the plate into the pet door insert frame.
Make sure that you DO NOT Drill too close to glass. Stay away 15mm from glass area. This way if anyone tries to push the pet door insert out, they cant and the pet door insert is secured to your sliding door frame.
What is adaptor u channel panel video, click here
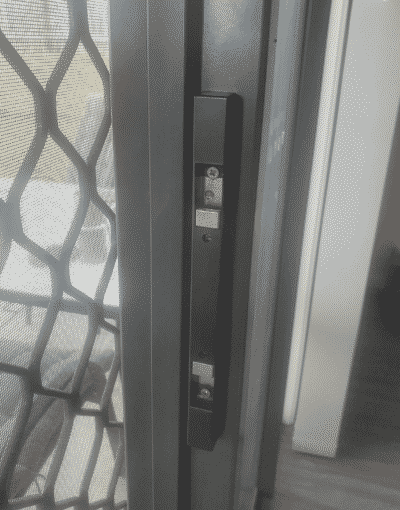
You will need
- Pet door insert, choose size and colour
- If you only like to install a pet door insert (no adaptor) please request for Patio Link to make top adjustable panel wider, edge to edge. Once you take black female latch cover off, you will see if it allows you to drill female latch directly onto the pet door insert, or a spacer behind it. If it doesnt allow you to do this, then the only way to lock your door is to install a Patio Bolt.
- Adaptor $ : close both glass and fly screen door into adaptor. You need to take off black cover from female latch to see if you can drill / install female latch direct onto adaptor. If it doesnt allow you to do this, then the only way to lock your door is to install a Patio Bolt.
- Plate to create 2x angle brackets / secure adaptor to frame $5 x 2 = $10
Another alternative is to do a CORNER INSTALLATION where fixed glass panel is. Watch this video here to see if you can do a corner installation
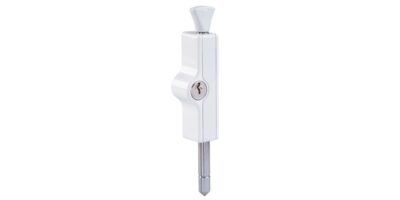
Photo of a Patio Bolt, available from local hardware stores, if required.
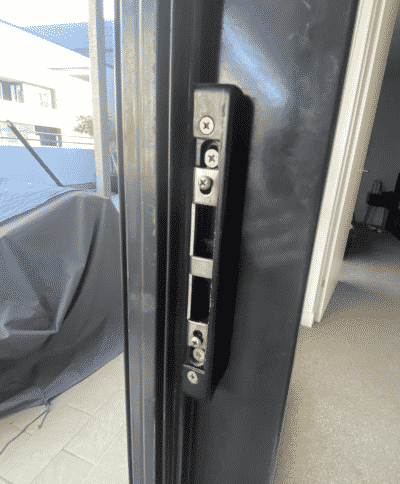
You will need:
- Pet door insert, choose size and colour
- If you only like to install a pet door insert (no adaptor) please request for Patio Link to make top adjustable panel wider, edge to edge. Once you take black female latch cover off, you will see if it allows you to drill female latch directly onto the pet door insert, or a spacer behind it. If it doesnt allow you to do this, then the only way to lock your door is to install a Patio Bolt.
- Adaptor U channel – Optional $ You need to take off black cover from female latch to see if you can drill / install female latch direct onto adaptor. If it doesnt allow you to do this, then the only way to lock your door is to install a Patio Bolt.
- Plate to connect pet door insert to frame or angle bracket if installing adaptor $5 x 2 = $10
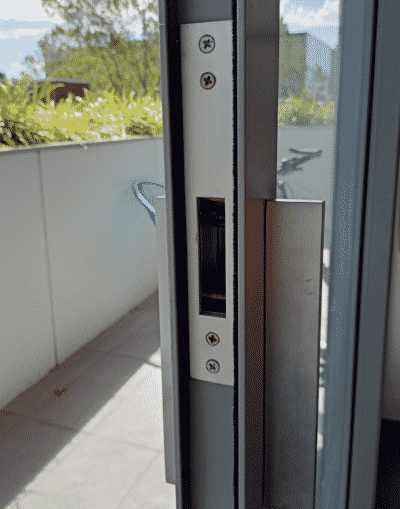
You will need:
- Pet door insert, choose size and colour
- Request for Patiolink to make top adjustable panel wider edge to edge ****
- THIS TYPE OF LATCH IS NOT COMPATIBLE FOR OUR LOCKING OPTIONS. See below PATIO BOLT OR Corner installation
- Plate to connect pet door insert to frame $5
You need to secure pet door insert to sliding door frame. You can take out 1 screw from female latch and use that hole where screw was to connect pet door insert to frame with a plate. You will need 1x PLATE to connect pet door to frame, and all you need to do is put 1 screw through the plate into existing hole where you just took screw out from and use pair of pliers and bend the plate and bring it forward to the vertical extrusion of the pet door insert and drill 2nd screw through the plate into the pet door insert frame. Make sure that you DO NOT Drill too close to glass. Stay away 15mm from glass area. This way if anyone tries to push the pet door insert out, they cant and the pet door insert is secured to your sliding door frame.
PATIO BOLT: To lock your glass sliding door you will need to purchase 2x patio bolts from your local hardware store and use Patio Bolt to lock your doors. To install a Patio Bolt, you will need to drill a hole into your sliding door.
CORNER INSTALLATION: Another way you can try and do installation is if you install a pet door insert in a corner where fixed glass panel is. All you need to do is look for screws around the frame that are holding fixed panel in place, and once you allocate them, unscrew them and slide the fixed panel across and fit a pet door insert in a corner. Butt up fixed panel to the pet door insert. Some sliding doors have a cover at the bottom track and if you have one, you will need to pop the cover out so you can slide the panel across. You can either cut the cover to accomodate new position, or just leave it out.
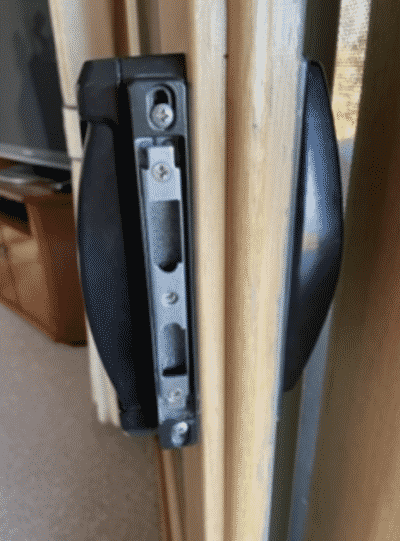
You will need:
- Pet door insert, choose size and colour
- Request for Patiolink to make top adjustable panel wider edge to edge ****
- Locking bracket : close and lock glass sliding door into a locking bracket
- Plate to connect pet door insert to frame $5
You will need to slide hairy mohair strip on the pet door insert at both sides of the pet door insert. Once you relocate your female glass sliding door latch (long black skinny latch) to a locking bracket, you will need to secure pet door insert to your sliding door frame. You will need 1x PLATE to connect pet door to frame, and all you need to do is put 1 screw through the plate into existing hole inside channel where female latch used to sit,use pair of pliers and bend the plate and bring it forward to the vertical extrusion of the pet door insert and drill 2nd screw through the plate into the pet door insert frame. Make sure that you DO NOT Drill too close to glass. Stay away 15mm from glass area. This way if anyone tries to push the pet door insert out, they cant and the pet door insert is secured to your sliding door frame.
This sliding door is a Double Sliding door where 2 doors open in the middle. Make sure that your bottom track is 26mm or more wide and you will need to purchase WHEELS $40 so your pet door insert can connect to left side sliding door and pet door can slide left / right.
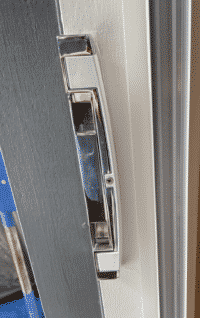
You will need:
- Pet door insert, choose size and colour
- Request for Patiolink to make top adjustable panel wider edge to edge ****
- L bracket for wooden sliding doors $14.99
You will need to slide hairy mohair strip on the pet door insert at both sides of the pet door insert. Once you relocate your female glass sliding door latch (long skinny latch) to a Lbracket on the pet door insert, you will need to secure pet door insert to your sliding door frame. You will need 1x PLATE to connect pet door to frame, and all you need to do is put 1 screw through the plate into existing hole inside channel where female latch used to sit,use pair of pliers and bend the plate and bring it forward to the vertical extrusion of the pet door insert and drill 2nd screw through the plate into the pet door insert frame. Make sure that you DO NOT Drill too close to glass. Stay away 15mm from glass area. This way if anyone tries to push the pet door insert out, they cant and the pet door insert is secured to your sliding door frame.
L Bracket for wooden doors comes with:
1x L Shape Bracket – to relocate female latch to this bracket and install it on pet door insert frame
3x Small Plates: 2x for Angle Bracket and 1x to connect pet door to frame
You will need to relocate your female latch to the L shape bracket, on the pet door insert in alignment to the handle. You will need a hand drill with 3mm bit and also pair of pliers, to bend the small plates to create angle bracket you need. You can install angle bracket at the bottom and top corner outside of the pet door insert to give pet door insert stability when sitting in a wider track.
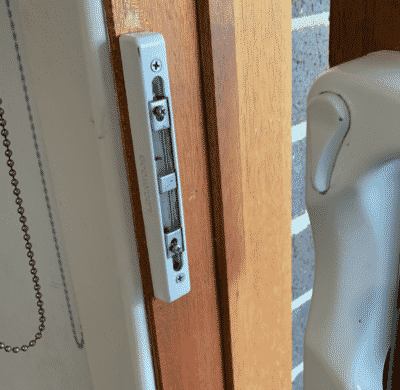
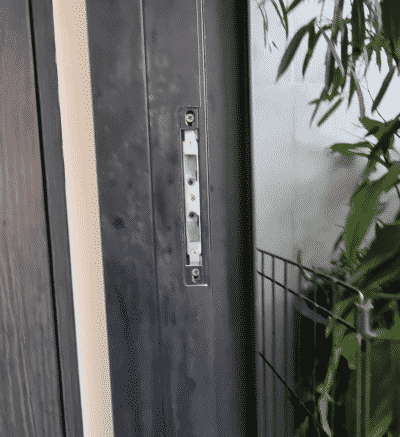
You will need:
- Pet door insert, choose size and colour
- Locking bracket : close and lock glass sliding door into a locking bracket
- 3x Plates: 2x to connect pet door insert to frame and 1x for angle bracket at the bottom
- ADAPTOR U CHANNEL – This is Optional $
Once you relocate your female glass sliding door latch (long black skinny latch) to a locking bracket, you will need to secure pet door insert to your sliding door frame. You will need 2x PLATES to connect pet door to frame, and all you need to do is put 1 screw through the plate into existing hole inside channel where female latch used to sit,use pair of pliers and bend the plate and bring it forward to the vertical extrusion of the pet door insert and drill 2nd screw through the plate into the pet door insert frame.
Make sure that you DO NOT Drill too close to glass. Stay away 15mm from glass area. This way if anyone tries to push the pet door insert out, they cant and the pet door insert is secured to your sliding door frame.
THICKER SLIDING DOOR CHANNEL: glass sliding door channel where the pet door insert will sit into at the bottom is thicker (3.5-4cm) than a standard channel width (2.6cm-3.4cm) , so when you sit the pet door insert, you don’t sit it on the middle rail at the bottom. You will need to bring the pet door forward in the track so you can align the locks easier to a locking bracket. With some doors, you might even need to use a clear plastic spacer to help align the locks together, (Clear Plastic Spacer strip comes free with every locking bracket). Use Plate and bend it with pair of pliers to create an angle bracket at the bottom corner of the pet door insert. Do not drill into your glass sliding door. One screw goes through the plate into the pet door insert and other leg from Plate/Angle Bracket is extended to the end of the channel. This supports the pet door insert to stay firm in place and it doesnt go backwards and forwards.
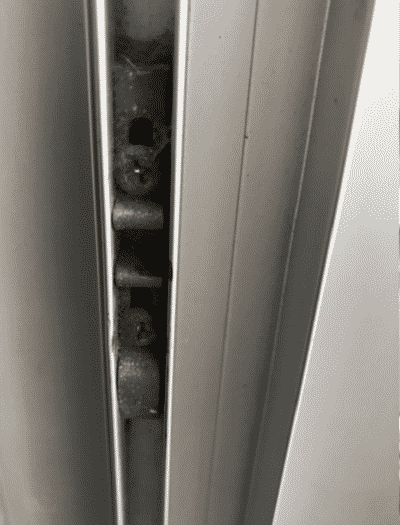
You will need:
- Pet door insert, choose size and colour
- Locking bracket : close and lock glass sliding door into a locking bracket
- Plate to connect pet door insert to frame
Once you relocate your female glass sliding door latch (silver wedged up skinny latch) to a locking bracket, you will need to secure pet door insert to your sliding door frame. You will need1x PLATE to connect pet door to frame, and all you need to do is put 1 screw through the plate into existing hole inside channel where female latch used to sit,use pair of pliers and bend the plate and bring it forward to the vertical extrusion of the pet door insert and drill 2nd screw through the plate into the pet door insert frame. Make sure that you DO NOT Drill too close to glass. Stay away 15mm from glass area. This way if anyone tries to push the pet door insert out, they cant and the pet door insert is secured to your sliding door frame
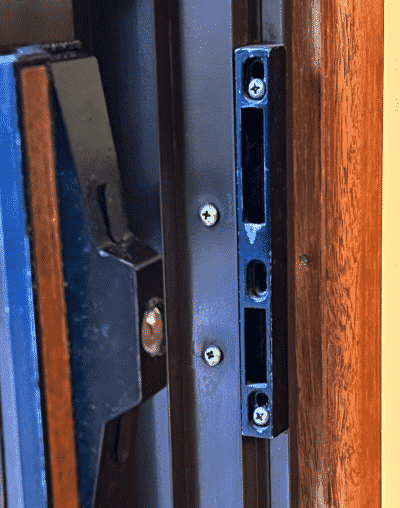
You will need:
- Pet door insert, choose size and colour
- Locking bracket : close and lock glass sliding door into a locking bracket
- Plate to connect pet door insert to frame
Adaptor (Optional) however if you have this type of glass sliding door female latch (long black skinny latch with screws pointing to the wall) , you wont be able to install latch onto adaptor because latch screws are pointing opposite direction and you can not drill this female latch to adaptor. If you do decide to get an adaptor so you can close both glass and fly screen door, to lock glass sliding door, you will need to install 2x Patio Bolts.
LOCKING BRACKET: Once you relocate your female glass sliding door latch (long black skinny latch) to a locking bracket, you will need to secure pet door insert to your sliding door frame. You will need1x PLATE to connect pet door to frame, and all you need to do is put 1 screw through the plate into existing hole inside channel where female latch used to sit,use pair of pliers and bend the plate and bring it forward to the vertical extrusion of the pet door insert and drill 2nd screw through the plate into the pet door insert frame. Make sure that you DO NOT Drill too close to glass. Stay away 15mm from glass area. This way if anyone tries to push the pet door insert out, they cant and the pet door insert is secured to your sliding door frame
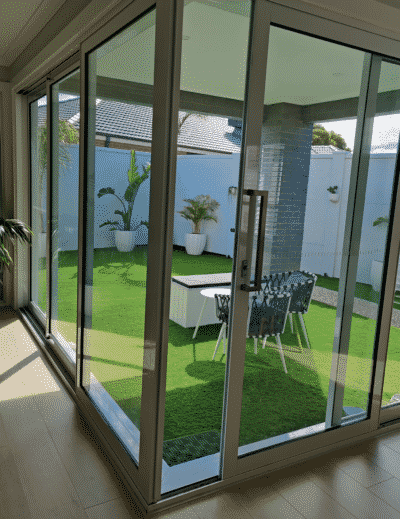
You will need:
- Pet door insert, choose size and colour
- This is a Corner Double Sliding door, see below info on installation
There are 2 ways you can install a pet door insert in this kind of sliding door:
1. Middle installation You can have the pet door as a temporary pet door where you take it in and out as you please. NOTE: If you plan to open both sliding doors out, never leave pet door insert freestanding in the middle as it is not secured anywhere and you dont want to risk pet door to fall. For locking, you can get a wooden stick / dowel and place one at each side channel of the sliding door so no one can slide open the door.
OR
2. Corner installation where fixed glass panel is You will need to look for screws that are holding your fixed glass panel in place, unscrew them – and slide the fixed glass panel & fit a pet door insert in a corner, then secure the fixed glass panel in a new position with a few new screws at the top where fixed panel is.
Doing installation this way means you do not need a locking bracket or an adapter and your main entry and locking remains untouched. You can open and close both doors and lock as normal.
When you move house, you just undo everything and put it back in original position.
Some sliding doors have a cover at the bottom track. If you have a cover at the bottom, you will need to pop it out (either leave it out, or cut the cover to be shorter) so you can slide the fixed panel across.
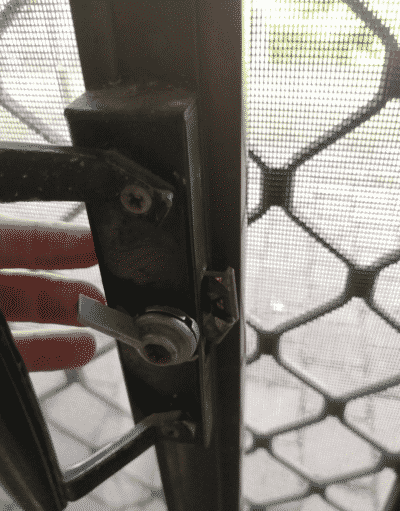
You will need:
- Pet door insert, choose size and colour
- Adaptor (Optional) if you have a fly screen door
- Plate to create an angle bracket at top and bottom (to secure pet door to frame)
- THIS SLIDING DOOR DOESNT HAVE A FEMALE LATCH. This is how handle looks like
This type of sliding door doesnt have a female latch that you can relocate. If you happen to have this type of handle lock, you can still go ahead and install a pet door insert but for installation you can:
a) Sit the pet door insert into your glass sliding door track and for locking install a Patio Bolt, and lock your glass sliding door via Patio Bolt. You will need to install 1 or 2 little angle brackets to secure pet door insert to your sliding door frame
OR
b) If you have a fly screen door, you can purchase an ADAPTOR panel so you can close both glass and fly screen door into adaptor. For locking install a Patio Bolt, and lock your glass sliding door via Patio Bolt. You will need to install 1 or 2 little angle brackets to secure pet door insert to your sliding door frame
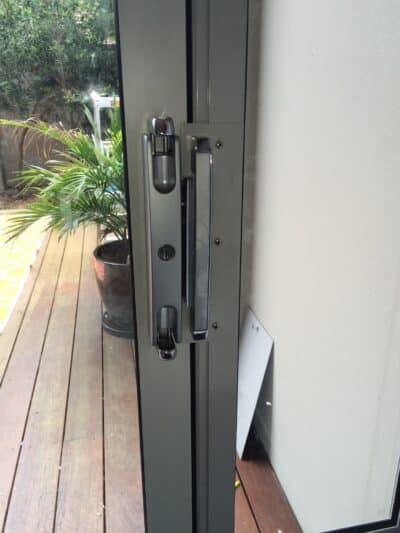
You will need:
- Pet door insert, choose size and colour
- Request for PatioLink to send you a flat plate like In this photo, so you can install female latch direct on the flat plate and bring it closer in alignment to the handle
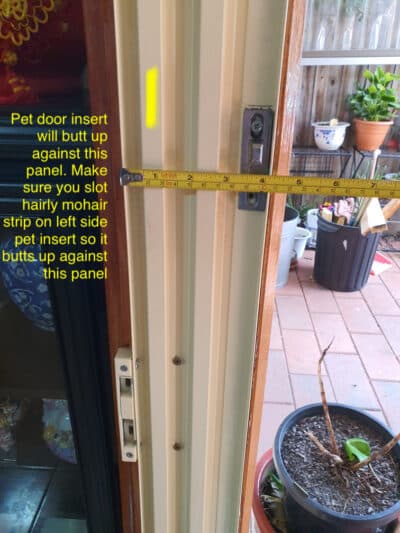
You will need:
- Pet door insert, choose size and colour
- Adaptor – close and lock both glass and fly screen door
- Plate to connect pet door to frame

